Sunday, December 30, 2018

Heading back North: squeezing in a mini New-Year's vaca....

Hello everyone! We're on our way back from the outlaws and are working our way north from Florida back up the east coast. We decided to try and make a short stop in St. Augustine for New Years. The folks at the St. Augustine KOA were really cool in helping us find a spot to camp on such short notice. 


Just a quick pic at one of two fast food stops before heading into St. Augustine. Heaven forbid we just skip the burger and fries!
We made it to another KOA! Carburetor issues seem to be the main focus of the day... both on the Onan and the 454.
 On the road up from south Florida we experienced the same surging of the engine while cruising on the highway. At the same time, the Onan was continually shutting down so I pulled into a rest area to adjust the Onan's carb and on the way back onto the highway the engine nearly conked out from all the hesitation and backfiring. Nearly all at once, the exhaust barked out a couple of times and she came to life. Drove very well and the vacuum gauge showed a jump of at least 5-6 pounds from what we were getting prior to the blow out. My last math showed we also got about 7.5 mpg compared to the dismal 5.3 mpg on the way down with the carb issues not resolved.

Typical lineup of campers and RV's when we visit. We're the oldest rig in the place.

The beach at St. Augustine near the KOA was just a 3/4 mile walk away. Great day at the end of the year to hit the beach. 80F degrees out and the water was pretty chilly! New Years Festival on the pier tomorrow evening.
 Hope everyone had a good Christmas and best wishes for a Happy New Years in 2019! Thanks for reading and be sure to check out the videos on the YouTube channel under The Vintage RV'er.

Monday, December 24, 2018

Road Trip 2.0: Three Days on the Road....

Hello all from Sunny Florida because we managed to make it down here! We spent Saturday heading down and overnighted in a Flying J in VA. That was a cold night! Glad to have the heater working on that night.

Second day had us heading down into SC were we stopped near Lake Santee, nice KOA there right off I-95. We had much nicer weather and the sunset was wonderful after a somewhat stressful day of stopping for gas only to have the rig do a "click, no-start" right after filling up! Nothing like turning the key and having NOTHING happen.... A battery swap, checking wires, etc. and finally she came back to life for the rest of the trip.  Needless to say, I didn't shut her down until we parked at the campground. Next morning, the same. A jump start later we were off for day three.

Second evening after that no-start. Glad to have the warmer weather and scenery....

Pulled into Apopka about 20 mins before closing time on Christmas Eve! Glad to have made it! Again, oldest rig in the place!

If you haven't read the old blog from 2015 where we wound up stranded in FL, you may not appreciate the almost PTSD reaction (would not say it was that because I don't want to insult anyone) from listening to any noise, or blip, anything that could signal a breakdown. The engine hesitation was the newest thing happening but I believe it's due to water in the gas from taking the last fuel from that one station the day before.

Hoping for better results tomorrow am! The no-start issue appears to be a worn neutral safety switch, fiddling with the gearshift appears to solve the issue. One is available nearby for pick up, so hope that a simple swap later will correct that issue.

Happy RV'ing All and Merry Christmas and Happy New Years from the Vintage RV'er! Check out the YouTube Channel for video versions of this blog.


Thursday, December 20, 2018

The Weather Outside is Frightful....

I've been watching the weather the last few days, just like a flight controller making sure that all systems are go and the conditions are right to launch. Looks like we will just squeak through a narrow window of weather....
Just love seeing this stuff on the web....


So I have the destination plugged in for weather and it shows severe thunderstorms in the morning. What???? It's as if Mother Nature has about had it at the end of 2018.

Okay. so I'm supposed to feel soooo confident driving down into this? Hey, I'm all about into having fun but I lived in FL for 3 years and wasn't so thrilled about the severe weather back in the '80's.

I guess we will just make sure we drive safely and do what we can to make it to Orlando next week....

Monday, December 17, 2018

T-minus 5 days and Counting! Road Trip 2.0

It's just past the middle of December and a couple of big snow events later since the November post. The snow is gone again and I've been busy getting the RV ready to go on the road.
November snowstorm. About 11 inches that day. Will be glad to have a break from Winter!

The trip plans are about the same and I'd like to avoid any really big hills on the way down. Don't know if that's going to be possible but will try.

This blog took a back seat to the YouTube channel the last couple of months, showing the repair and upgrade work being done to get the LH 2 ready to go. Furnace, genset both gave me issues that are now resolved.

Along with a fixed furnace and genset is a new set of wheel bling for the road trip! Just like the original ones!

You can watch the progress here:  TheVintageRV'er YouTube Channel

I'll be posting videos of the trip starting Saturday or Sunday (Dec 22-23) if all works as intended. Day 2 is going to be the BIG part of the trip from MD to SC but hope that's on more flat terrain. 

Wednesday, November 7, 2018

Planning Road Trip 2.0.....

Here we go! The plans are in motion to do a trip down to Universal Studios Florida ( Yes, the same state that the LH 1 was left over in Daytona). There are a couple of things I want to modify and get set for the trip. One is that rear end swap to what I believe will be a 3:21 ratio and to check out the genset so we can make sure all is up and running during the entire trip.

Big challenge is find a shop that will do it without me pulling the rear axle off to hand to them.

I have to admit doing this trip gives me a bit of the willies only because I really don't want a repeat of what happened in 2015. Hard to believe it's been just over 3 years since that insanity. Planning on taking a couple of days to get down there, maybe 3 just to not push things too much.

More details as the date gets closer! Happy RV'ing all!

UPDATE:
Been talking to shops and they all have the same concern: if you drastically drop the rear end ratio then you may find you can climb hills that well (uh, have you driven my RV????). I'm not going to tow anything with this RV so I figured it wasn't as big a deal but the more I think of it the more concerned I get. Hey, Pennsylvania has lots of hills and I wind up driving through there a lot. Once you swap the rears you're done -- you're stuck with that ratio no matter what. With an overdrive kit (look them up, not cheap!) you can set it up to go into overdrive in any gear, effectively being able to split gears and with a 3 speed you can simulate 6 gears. Too much for what I'm trying to do and for the same price I could get a totally reconditioned 700R4 transmission (4 speed, overdrive) that gets me cruising speed without cutting the driveshaft or messing with the rear end.

A GM 700R4 4 speed transmission unit. This has a final drive of 0.70 which would make a 4.10 rear end act like a 3.20 rear end, boosting cruising efficiency.
 I see websites that say doing this may increase highway mpg 20-30%. Now that may just be overly-optimistic but when you're talking going from 6 mpg to over 7 mpg that saves you about $100 in gas on one 1,200 mile trip to Floriday -- one way. After 6 or 7 trips you've paid for the transmission. Not bad.

Thursday, August 16, 2018

Getting to know you..

We made it back from Lake George and I immediately drove the RV into the Parameter shop to have them check the brakes. This was after I had them do an alignment for me at really short notice. Got me in and out on time for the trip. After a check of the system they said it was "immaculate" so my fears that some previous owner goofed up my brakes was put to rest.

Ring and pinion: what makes your RV go in the back. Be kind to it at all times.

Now, with that positive result I gave the go ahead to prep for the rear end gear swap. I've debated on this a long time since the first year of trips and wanting to travel further but not at 5MPG. The RV gets up to speed just fine but the engine RPM is about 3200 at 65mph so that's not really in the optimal range to run a big block 454. I'd love to be in the 1800-2600 range but will settle for a bit on the higher range of that scale.

The RV has for some reason a 4.10 rear end. That gets me the 3200 RPM at highway speed and I'm happy to know that other Allegros were equipped with 4.88 rear ends (holy cow! that puts you at about 3800 RPM at highway speed! YIKES!). No thank you! At $3 plus a gallon I need to find ways to reduce my fuel consumption at cruise and I'm not expecting to tow anything with this RV.

Obviously sometime early last year with the under $3/gallon for 93.

After researching on the interwebs I thought I found a 3.55 set but that's only available in the 8.5" diameter set, not the 10.5" set in the RV. The one I found is a 3.42 ratio which would drop the cruising RPM's down to about 2500 or so. Not bad.

While I don't think that this is the way to substantially increase my mileage, I figure it can't hurt on the long trips we're planning next year and at $300.00 a tank full it's worth it to get the MPG up from 5 to somewhere around 8 or so with this and some adjustments on the timing.That's saving about 60% and each tank full is about 85 gallons or about $305.00 per tank. If you can stretch your mileage out from 5 to 8 mpg then you go from 425 miles/tank to 680 miles/tank. Going cross country at about 3000 miles you would go from filling the tank over 7 times to 4.5 times or a savings of $763 over the trip. You just paid for the swap in one cross country trip then some.
By the way, if you are running way past half on the temp gauge, below half on the oil pressure and just showing nothin on the amp gauge (not to mention below E on the gas...) you are in some serious trouble.....
I will be updating everyone on the swap work in the next week or so after we get back and plan the next trip once the swap is done.

Save RV'ing Everyone!!

Monday, August 13, 2018

Road Trip 2018: Lake George! Having fun but at the same time evaulating the repairs of others....

Alright folks! After having the LH2 visit two shops to get the timing and belts replaced and then the alignment done we got on the road late on Friday. We were supposed to head out at 9 am but due to the extended visits at the repair shops we didn't hit the bunk ceiling project until late afternoon on Thursday and wrapped it up in true Long Hauler style minutes prior to departure!
Ugh! Nasty water damage over 30 years removed and stripped out. Getting ready for new materials after sealing the roof up. 
Using maple plywood to make new panels in the RV at the bunk. Make patterns out of sheets of plotter paper and go from there....never mind the other vehicle projects in the background.

Foam bubble insulation with aluminum finish used with spray adhesive to fill the gaps in the frame and skin. Up to 4 layers were used. FRP panel was installed on the curved part and it fit GREAT!!
 With the bunk area redone and finished off to usable status we got things prepped to get on the road. The hardest part was getting the bunk panel back into this area and onto the metal angles! Such a puzzle piece to fit back in! We did do it after a couple of tries.

Okay, bunk back together and all the stuff for the trip placed into the RV and we're on our way to Lake George! After getting in several hours later, we managed to get our stuff set and on the trolley to catch our boat ride....before that we ate at "Slices", pizza place right on the corner near the Steamboats in the center of the Village. Outdoor seating on the upper floor was nice to view the amusement park next door and be above the traffic.

The Minnie-Ha-Ha Steamboat. A great paddle-wheel boat tour. Right in Lake George Village, Steamboat Row.
 A great tour of the lake from a steamboat on a wonderful Summer evening. Despite that this was the "Pirate Cruise" with the constant "arrgh" voice over, the trip was pretty nice. The boat was built in the 1960's but uses steam technology to drive the paddle wheel. Up in the Finger Lakes we had similar boats but they were side wheelers. It would be cool to see some pop up in our neck of the woods again. You can ride a "steamboat" on Canandaigua Lake for lunch and dinner cruises.

Here's a sample pic of what we used to have on Seneca Lake:

This was one of several side wheel steamboats on Seneca and other Finger Lakes back in the last century.

View of Lake George that evening from the Minnie-Ha-Ha heading north.

View from the first deck of the lake.
The lake cruises were about $80 for a family of 6 and lasted about 90 minutes. Great for the kids to experience a boat ride and not too stressful for the parents.

The Lake George RV Park is situated just off the main Route 9 road and has a lot right on the park for kids and adults to enjoy. For the nightly rate of about $109 you do get a really well maintained park, professional staff, on-site spray park, trolleys, theatres, arcades, and more. While it's a bit more than I've paid on other campgrounds I cannot compare this one to the others. No contest. The only thing I had reservations about was that there were so many other campers nearby. Even with that, ALL the campers were considerate and we never had any noise issues. That's a BIG credit to the park for keeping so many sites consistent with park rules.

Here's a link to their site:  http://www.lakegeorgervpark.com/
It's no BS on what's there. Here are some shots of the place from our trip.
 One of many playgrounds on site at the Lake George RV park.

Getting settled in on Cedar Lane in the Lake George RV Park. A drive through site that would accommodate just about any size rig. Electric, water and septic right there with a REAL level area to park.  Kids noticed that campfires were located so we couldn't see other camper's fires, which was nice to make it feel like we had our own campsite. 

Fishing for Bass in the park's pond. Canada Geese looking on as we try and get a bite.

After a couple of days at Lake George it was time to head back home. I have to say that with what happened to the Tioga I still deal with PTSD when driving the rig. It's like flying an old plane that will do the job as long as you listen for any noise, keep checking the gauges and have your mind on a high level a alert the entire time you are on the road. There develops a certain level of "feel" for the old gal as she does her thing and any unusual shudder or squeak sets you thinking about what job you have in store to get it fixed.

Surrendering to others to fix things can be a mixed bag.  While I like to think that people who make a living fixing rigs like mine have a special talent for doing so, my paranoid nature constantly questions the results. The timing issues with the new distributor still don't appear to be fully corrected. Is this the fault of the shop I sent her to? Maybe. She still runs a bit rough and I am not totally satisfied that its been tuned as well as it could be. Backfires, hesitation on acceleration, etc. is not what I expect from a well-adjusted carb and distributor. Anyway, more of this later.

The bigger deal is the brakes. No ones fault on this one but I bet the brakes have NOT been dealt with since the rig was new off the line in Detroit in 1986. With only 48K miles on her now, the brakes should still be in good shape... right. After 30 years it's time to get all the bits checked out. On the return trip I experienced some squeaking, shuddering on braking (bad shudders that got me to downshift to slow down!) that leads me to believe I have some brakes that are not releasing completely upon hitting the 'go' pedal. There's not much more upsetting than to try and stop and feel as if your rig is saying, "aww, heck no. This ain't happenin' right now as fast as you want it!"

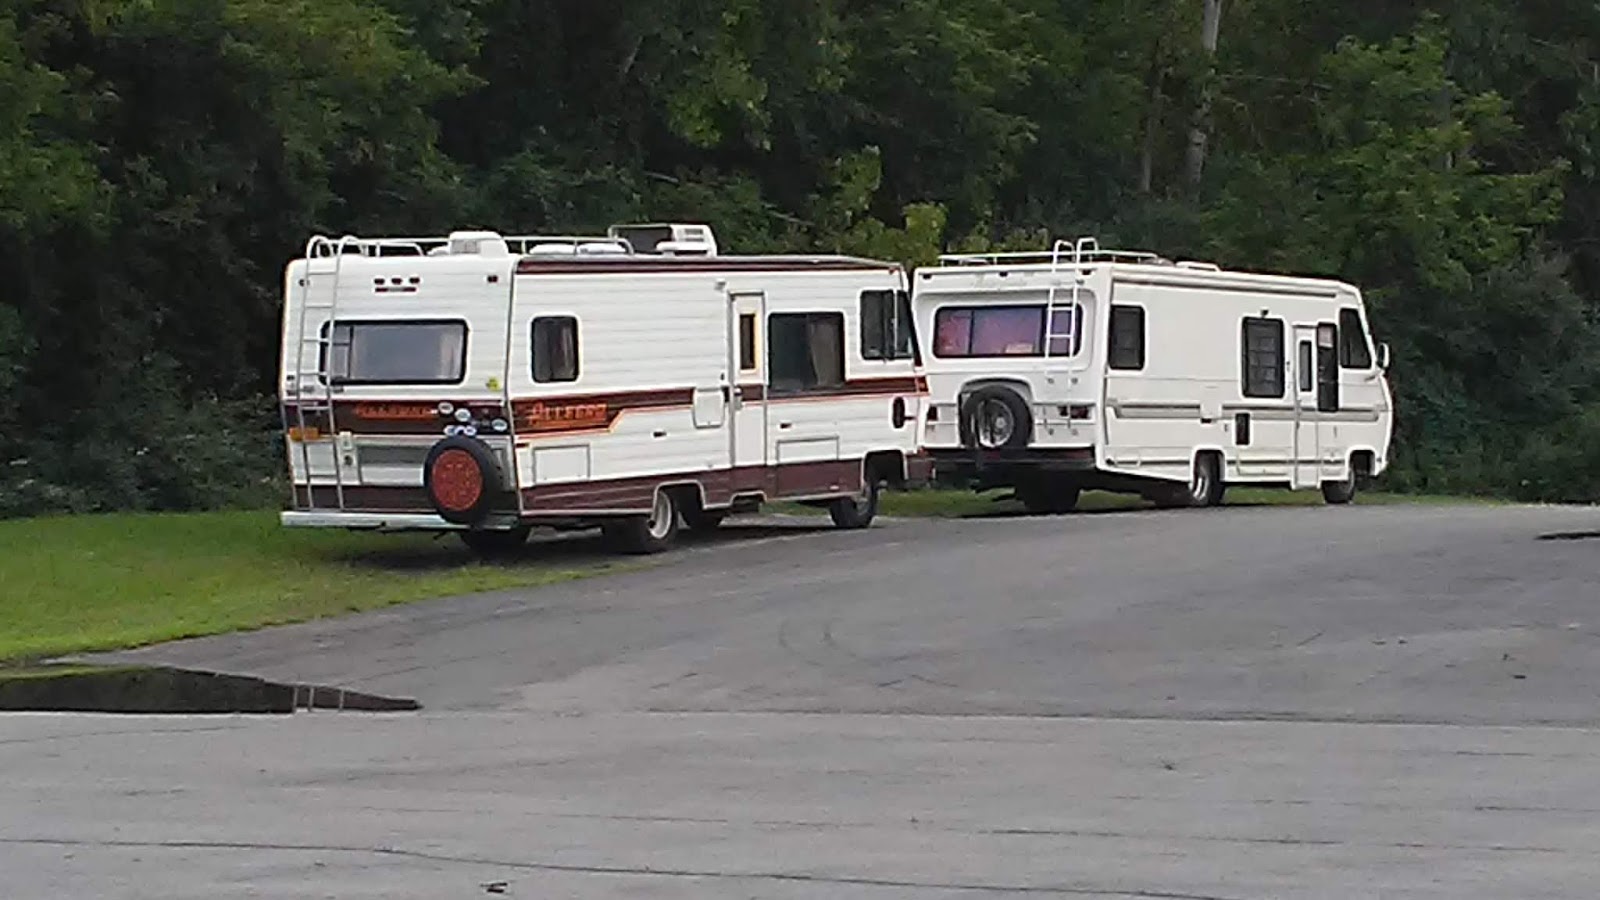
At the "text stop" to eat lunch and see what the heck was going on with the shuddering brakes.

We stopped at a "NYS text stop" to eat lunch and it let me inspect the rig a bit for the braking issue. I have to say that one wheel location smelled like burnt brake pads. We made it back no issues but she is in the shop right now to get looked at. Brakes are like the parachutes of the flying set: better have them right than maybe right. Maybe can gets you killed.

As always, more later!!


Thursday, August 9, 2018

Late in the Game: Getting set for 2018 camping season!

I have to say that with the kids getting older, one going off to college this Fall, all the kids camps and everything else has left little time for us to head out to the great outdoors in the RV. Well we have committed to travel before our #1 heads off and the two trips will be Lake George and Letchworth (the Grand Canyon of the East!). Not too far away but far enough that it's not home.

Before that can happen I've sent the LH2 off to not one but two shops to get the timing reset after installing a new distributor and get new belts on the lady to stop all the squealing. The second shop is a truck shop that has a Hunter alignment machine so I'm not pulling the steering wheel far left to keep the rig on track (more on this on a future post, some mods and part replacement in store).

Out with the old and not yet in with the new! Okay, got it in and now it needs tweaking...
 You can check out the video of swapping out the old distributor with the new one on my YouTube channel. What fun! Thought I had it all figured out but I know enough to be dangerous.
Right by the NYS Thruway at exit 42. Good folks here for RV's.
 Went from Robson's in Waterloo with new belts and timing fixed to Parmenter, Inc. just south of the Thruway to get the wheels aligned.
Waiting in line for an alignment.....think that my rig looks nicer.
Next thing to do is to fix up my daughter's bunk area. The ceiling was shot in the back and we are going to fix that up so it doesn't look like a scary, dark spot. More on that later once I get the RV back.

Happy and Safe Camping Everyone!!
The Vintage RV'er.

Wednesday, June 13, 2018

Bringing back that Shine!!

All of us vintage RV owners know that at some point the exterior finish, exposed to all sorts of weather and temperatures and UV rays tends to age and in the case of aluminum paneled RV's (which I think have it made over fiberglass panel RV's!!) the paint and coatings get chalky and dull. Now that's not so bad but when the white portions start to run down over the darker color trim bands that's when things start to look a bit used.

What to do? You can clean it and clean it but at some point those aluminum panels will wear down the paint coating and you're left with a repaint. At this stage we have an Allegro that is not there yet but showing signs that a good go over is needed.

I'll share with you my technique to clean, prep and clearcoat my RV. The supplies consist of a set of cleaners to kill off the algae that grows on our rigs, cleans of the debris and also helps strip off the oxidized layers of the color coat. Now, you don't want to strip all the coat off, just enough that you get rid of the grime, algae and other foreign materials. The clear coating will help bond and preserve the remaining base coat.

Unless you like the military drab look on your classic RV, then get ready to bring back the shine!!

Steps I took to restore the finish (fiberglass and aluminum were separate).

Fiberglass:
1) take glass cleaner (Castle Glass cleaner or similar ammonia based cleaner, spray on) and cover the area to be treated.
2) use 4 O steel wool (0000 on the package) to rub off the oxidation without leaving marks on the fiberglass. I have NOT used power sanders because I don't believe they allow the control you need to stop before you sand too much off.
3) Respray with glass cleaner and use a clean rag to remove all residual dust.
4) Look over the panel to see that you got off any over sprayed paint, oxidation and other discoloration where you could.
5) Spray a light coat of clear coat over the area. It's really tempting to over spray now because you can see the improvement right away but with clear coat it will drip even more than paint. Keep with several light coats. You should not have to sand between coats unless you get a bad drip. Heck, I've over sprayed knowing the coat would just drip down and run off the bottom of the panel.

Aluminum:
1) Glass cleaner sprayed over area and wipe off with rags. You may need chlorine based cleaners to kill off the algae that grows in the seams but DONT MIX these as you will get a version of ammonium chloride!!! I believe that is mustard gas.
2) use rubbing compound and rags and apply the compound to the rags, rubbing most of the compound on the area to be cleaned. Let it dry for a minute and start rubbing, using the compound as your abrasive to get off specks of bugs, paint chips, stains, oxidation, etc. from the panel.
3) use glass cleaner to spray and wipe off the areas with a rag or paper towel to remove all the compound.
4) Spray clear coating on the panel over several coats to get the even shine with a smooth finish.

Here are a few pics of the work being done on the fiberglass front and aluminium sides.


Friday, June 8, 2018

Dometic Fridge Recall: FYI.

Hey Everyone!
Just thought I'd pass a couple of links to you so you are up to date on some of the appliances residing in your RV. One is the Dometic 2 way fridge (LP gas, electric) that may have an issue with coolant leaks and some small fire issues.

This is the link for you to check out what has been a lengthy recall on the product. Check it out and have your model number and serial number (found on the inside of the fridge door in most cases) ready to input and the site will tell you if your fridge is one of the units needing work. The retrofit consists mainly of adding a "secondary burner shield" to the bottom part of the unit. This allows more shielding and has a thermoswitch that allows shut off of gas to the burner in case it detects more heat than allowable.

Link: http://67.238.126.140/  this is an IP address that takes you right to the Dometic USA site.

If you cannot find a repair shop you can buy the recall kit online. This will require you to perform the work yourself or find an RV shop that is willing to do it. The RV shop should be doing this for free since they will be reimbursed for the time by Dometic. In any case, here is the kit with instructions and all parts:

https://www.ebay.com/i/201196946668?chn=ps

This may not be available for long so be sure to verify it. I bought one and it was just fine.

Be Safe out there!!
The Vintage RV'er.

Wednesday, May 23, 2018

Memorial Weekend 2018: oil change on Onan....

Hello everyone!
I have only put about 20-30 hours max on the Onan since we had it but the oil has not been changed in over a year. Yep, there is a reason you don't go by miles/hours alone. Upon pulling the dipstick I could see it was low. Not dangerously low but low nonetheless.

So, pull out some 10W30 and then.... how much oil does this thing take anyway??? IDK. You would think I would remember this from the last oil change but come on!

went onto the interwebs and found the actual manual. I only have the parts lists and dealer service listing. Gotta get this downloaded somehow.
Yep, 3.5 quarts to do the job. Glad I checked!!

This is a Fram eazy off filter for a BMW 325i from the eighties. Perfect fit. $6.

New oil in the genset! Nice and clear as compared to the black sludgy oil drained out. Not 30 hours on the genset but time takes it's toll.

Yikes!!! Only about 2 quarts drained out on this change. Good thing I had new oil and filter. Will have to keep an eye on the oil consumption. Manual says, "check daily" no kidding....

In any case, 3.5 quarts did the job. Full up and filter, too. I use filters for a E30 BMW (the  6 cylinder M20B25 engine) and this fits PERFECT. So this should mean I'm all set for this Summer's trips around the area! Glad so much as come together and systems not working at all for years are now sorted out and ready to go. Thanks for reading!!

Saturday, April 28, 2018

The Onan Genset is back on-line!!

Hello Folks out there in Vintage RV land!

I have posted up some videos on my effort to address some of the quirks of my BFA 4.0 Onan Genset that provides AC power to my rig and helps charge up the batteries. The past summer had me whacking the genset control panel with a rubber mallet to get it to start up, otherwise hitting the start button you would just hear the cycling of the solenoids... clicky, clicky, clicky. After doing that for a while the starter solenoid just broke in two and that was the time I decided to clean everything up.
My Box-O-Parts collected over the last few months... no kidding. The one solenoid took over 2 months to get.
The YouTube Video can be found here:

https://www.youtube.com/edit?o=U&video_id=4heM5msoRkM

Between Amazon, Jackssmallengines.com and other sources I ordered up the new parts and made up my mind to eliminate any old parts and get this Onan back up and running as it should. Most of the parts you can still get but the relays are NLA, so  you have to improvise and order some Bosch 0 332 209 150 relays (5 pin~!!!!) in lieu of the original Bosch 0 332 209 125 relays. Same wiring and function.
Managed to get all the new and alternate bits in place, fit on new clips and prep for restart!

While doing the video I was really ticked that the Onan wiring harness was all white. How do you figure out what wire goes where with no color coding???? Easy, you realize that the wires all have codes written on them. I mean the wiring diagram (not schematic) has all the wire codes on it and you can follow just what goes where when installing new parts. Glad I figured that out!\
Yeah, remember this is a "schematic" and not the actual wiring diagram available on the manual or on the interwebs. 
Some details came up over which starter solenoid was the one for this genset. When I bought it the genset had a 4 post solenoid like an old Ford version. The two post for the battery then another two for Ignition and Start on the front. I order a replacement based on the model and they send my a 3 pole version. Oh, oh. What to do?? Well we should refer to the wiring diagram on the genset and what do you know the diagram shows both posts ( ignition and start) on it.

It's nearly 10pm and I've started up the generator several times both at the genset and on the remote panel up front. Seems to work just fine! 

Thursday, March 29, 2018

Cleaning up the 454... the after-effect of a crank, no-start issue

So after having such a great set of fast starts on the rig she decides to toss me a crank/no-start issue. Yippee! I had replaced most of the distributor parts last year to clear up any question of start up. Now it seems that I should have done more after 1 year and 900 miles?

My #2 son and I spent an entire weekend working on this issue, removing all the top end parts to get to the carb and other smog components that may have caused issues. We did find a cracked vacuum line that we replaced  to the delight of the engine start.  We also decided that after the RV furnace project that any part that was not looking in tip-top shape should be cleaned and redone to bring it back to the condition is was in during the delivery from the factory.


 All of these pics are from the project where I cleaned off as much of the engine as I could, rust treated the metal and then repainted the engine to prevent any further rust to build up. I still cannot believe how many vacuum lines there are and pumps, belts and all such nonsense to get an engine to run. At the end of the day, I replaced half of the spark plug wires on the right side and in the process shown what else could be upgraded and repaired to improve the operation of the motorhome.

Best Regards,
daniel.


Working Towards Spring.... Clean up and fixin' stuff....

I am so glad to have the Allegro's furnace rebuilt, installed and WORKING. My #2 son and I managed to blow out all the ducts and re-install them on the furnace unit. If you ever visit me on a very cold night --- go right to the bathroom. This is by FAR the warmest room in the RV. The rest of the RV heats up just fine but when you open the door to the potty room you are welcomed with a warm rush of air that rivals Swedish Saunas.... ok, not that bad but it is much warmer than the rest of the rig.

Along with this final install furnace work we decided that the press-board trim installed on the ceiling was needing replacement. Forget that this trim was double the size it was because it absorbed water and swelled up. We went to Lowe's and bought 1x2 oak trim strips to install. I had to countersink the screw holes nearly 1/2 way into the wood to get them to mount the right way but we got it dun!!
Along with the furnace and trim fixes we tackled the surface rust on the stove hood and surround by grinding all the rust off, treating with converter, and repainting the bits to seal them up for future use. The Allegro is lookin' pretty good this year! We also installed a shadow box display cabinet (look at the first photo) next to the door to store our trinkets for each camping years' worth of memories!! Then it goes into a scrapbook for the kids.

Happy Camping All in 2018!

Sunday, March 18, 2018

All systems normal (not always "go")....

This may not be a picture heavy post but one that links you to a couple of videos I've managed to cobble together on the Suburban furnace project I finally tackled. This RV had a furnace but I never even attempted to fire it up for fear that it would, well, catch on fire. With years of disuse and who-knows-what collecting in the burner, fan unit and other areas it was best to leave it be until I could tackle it this weekend. Glad to say that the result for now is a working furnace that can get the interior up to nearly 90F on a 32F day!! I still have to blow out the flex ducts but the complicated portion of getting the unit out, repaired, cleaned and installed is done.

Check out the two YouTube video links on here for how it was done. It was a collection of short video bits put together over this past weekend so I hope it makes sense and you get some benefit from it. I don't have professional video production on my channel.


I could not believe that even with just filming the critical bits I still wound up with a 22 minute video! The second part is about 14 minutes.


Have fun watching and remember all this fun is free. I  put this up here for fellow Vintage RV'ers looking to keep the older rigs running and it's worth it just getting the looks from folks as you pull into the campground! 

Friday, March 16, 2018

Getting others into the Vintage Club!

This post shows a few photos of an old Winnie RV that one of my fellow Good Old RV's members is considering. He's from Quebec and looking for a fairly specific model Winnebago. Well, I found one in the back roads of Yates County for him and we shall see if this is a workable situation for him. He wanted a "fixer-upper" and he will get one with this RV.

Below are a few pics of the '78 Chieftan that I went to see this past Monday. Not bad for a yard relic and you can tell this has not been abused other than not being kept in a barn.

Most normal people would drive right by this beast without even a second glance but when you get hooked on that retro RV vibe it's hard not to have a sense of nostalgia (my oldest quickly referenced Disney's Witch Mountain from the '70's) and for the younger crowd maybe there is a feeling of things being much simpler back then. Yes, they were in many ways for technology but in a lot of other ways not so much. 

Getting back to the weeks-old CL ad and waiting to hear a reply to the question, "is this still around?" took a couple of days but in the end I got to at least take a tour of what is a basically an RV time capsule. Everything is original in this rig, the cushions, appliances, even down to the Code of Ethics laying on the back couch is there.   The  visit started with me traveling down from work in Penn Yan to the RV site in the south part of the county. Sam, the son of the owner, shows up and we talk a bit and he starts walking through the snow to get into the RV. Unlocked, we get in and I gotta say the fear you have of an old RV is that the "stench" will get you right away. Other than the smell of old shag, plastic and just sitting around that was it. Good sign. No pets, no BAD PETS..... 
As I mentioned, everything was as it was when is parents decided that this was not a priority and left it on their property until such time they could hop back in and travel. Inspection sticker on the windshield is dated 1994. I think, "hmm, not that long ago" and then I do the math... 24 years ago. One year before I got married (crap! that long?) This rig is a great example of what Winnebago was offering for 1978. You could clean this up and have a pretty good vintage RV.

Now the question remains: the drivetrain. The engine is the 440 V8 with the 727 3 speed Tourqueflight transmission. Not a bad combo for the year. The engine has a 4 bbl carb (looks like a Carter). and all the bits look like they have not be abused at all.


 This was found on the back couch and I've uploaded a PDF version of this for use by anyone interested in putting it up in their RV or giving out copies. Good stuff. Wish more would read this and follow what is just simple and plain advice.

With this trip if a vintage RV can get some new life on the road then that's terrific! Too many of these rigs were sold and owners dreamed of all the road trips only to have life, family and jobs rob them of getting out there and experiencing what is not always an 'incident free' vacation. Hey, sometimes it is the bumps in the road that build character!!!

Have a great time planning, fixing and dreaming of that next trip and remember that it's not the destination but the way you got there that really counts.....
The Vintage RV'er.